Tuesday, December 30, 2014

Brown Sugar Cupcakes with Browned Butter Cardamom Frosting

If you love Cardamom like I do you would love this cake and frosting. Today my friend visited with her two lovely daughters and I made a batch of this cupcakes for them.This was the only one that was remaining, that too because I saved one for Jai as he was not back from work yet. I think that itself tells you how good they were.
A brand new year is about to begin. Hope you are ready for more great experiences and adventures! Happy New Year to you all!
Ingredients:
1 cup loosely packed brown sugar
1 large egg
1 tablespoon cardamom powder
3/4 cup milk
1/2 cup unsalted butter, melted and cooled
1 1/2 cups all-purpose flour
1 1/2 teaspoons baking soda
1/4 teaspoon salt
Method:
Preheat oven to 350 degrees F. In a bowl, combine all the dry ingredients and mix well Set aside. Line a cupcake tin with liners.

In a large bowl, whisk brown sugar and egg until smooth. Add in milk, again mixing until combined. Slowly pour in melted butter, continuing to whisk. Add in the flour, soda and salt along with cardamom mixing with a large spoon until batter is smooth.

Using a 1/4 cup measure, add batter to liners. Bake for 16-19 minutes, or until tops are puffy and golden, and don’t jiggle when touched. Let cool completely.

Browned Butter Frosting

Ingredients:

1/2 cup butter
2 cups confectioners’ sugar
1 teaspoon cardamom Powder
1 1/2 to 2 tablespoons milk
1/8 tsp of salt

Method;

Melt butter in a small saucepan over medium low heat. Continue to cook, watching carefully, until butter becomes an amber color (watch carefully to avoid burning as butter changes from amber to burnt easily).  Remove from heat and allow to stand 2 to 3 minutes; do not stir so the solids can sink to the bottom of the pan.  Slowly pour the melted butter into a heat proof bowl, leaving the last 1 to 2 tablespoons of melted butter and the solids in the pan to discard later.  Allow the amber melted butter to set at room temperature 2 hours or until thickened and softly set.
Beat sugar and cardamom into soft, browned butter.  Add 1 tablespoon milk.  Gradually add an additional tablespoon of milk, about 1 teaspoon at a time, until of desired spreading consistency. Add the salt and mix well. Frost the cupcakes after they have cooled down completely.

Tuesday, December 23, 2014

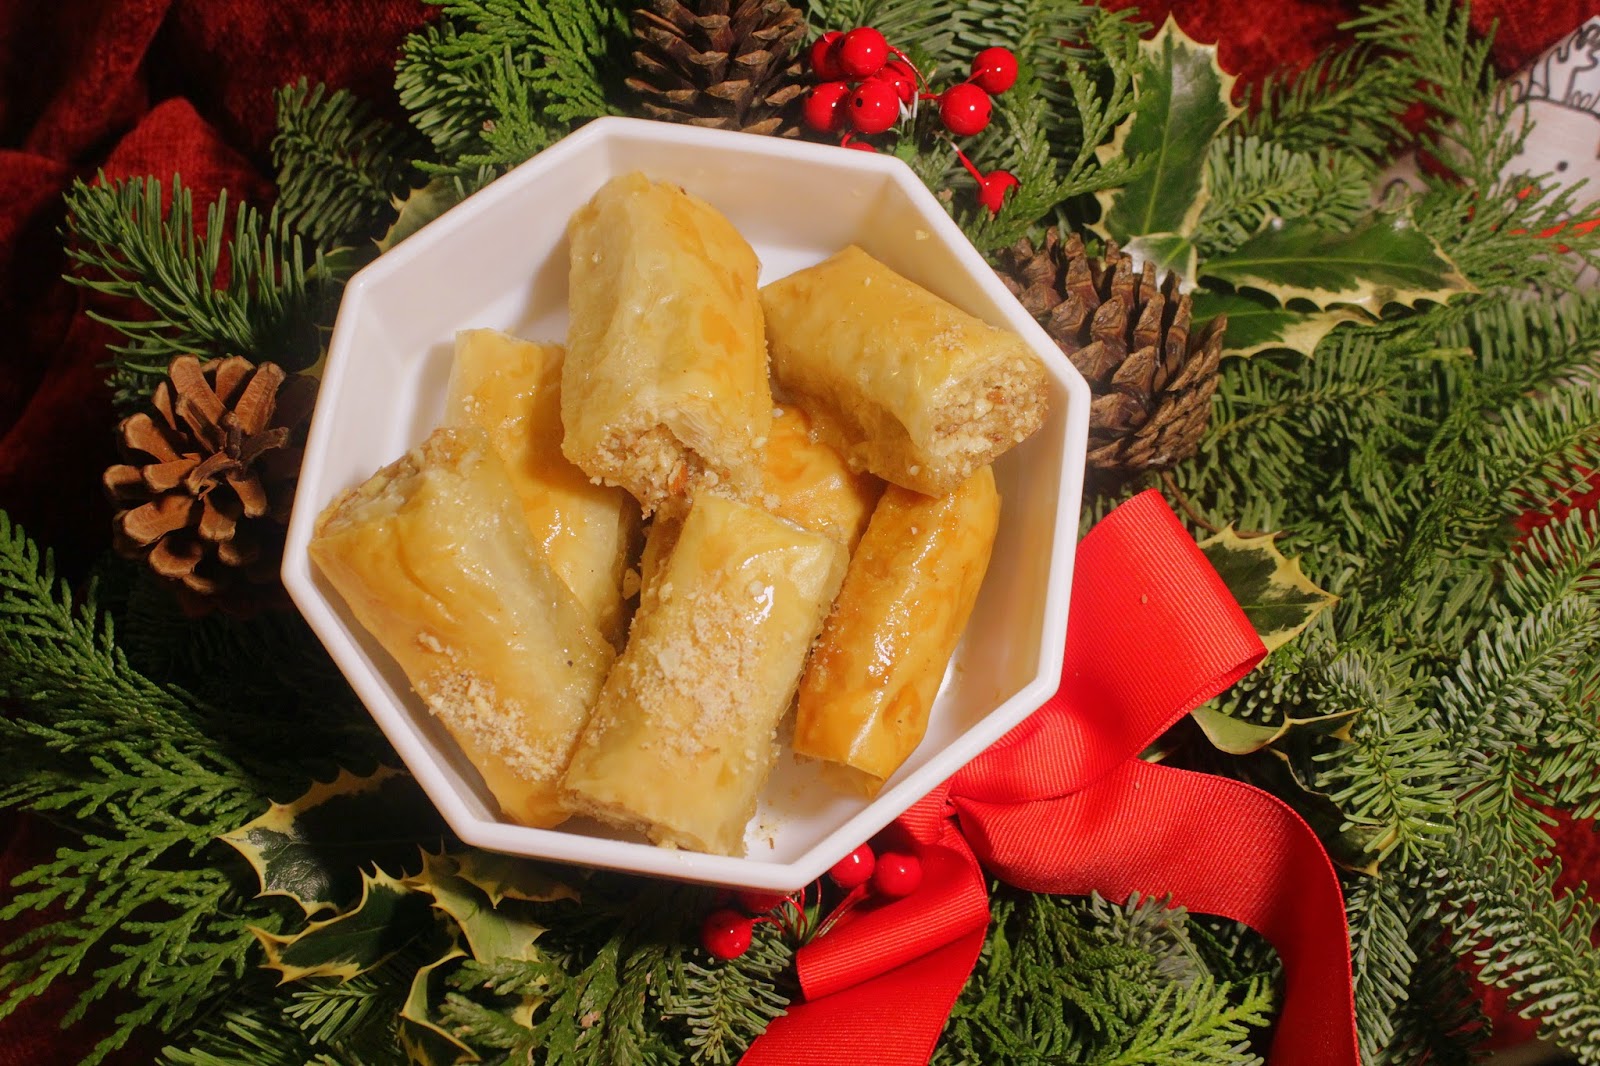
Rolled Baklava

With Christmas around the corner and also to have a treat ready for the unexpected guests who stop by,  I made these delicious Baklavas. Instead of making them the traditional way I made them into rolls . I found this easier to serve and even little ones as old as 3 could eat it with out making a mess. So if you are planning a Christmas or New years party this would be a great make ahead ( I find Baklavas to taste better a day later)  dessert.
Happy Holidays!
Ingredients:
2 cups raw (and unsalted) nuts( I used a mix of almonds,walnuts,pecans & pistachios)
1/4 cup sugar
1/2 tsp ground cardamom
1/2 tsp ground cinnamon
1/2 tsp ground nutmeg
3 whole cloves ground
1 lb. phyllo dough, thawed
6 oz. unsalted butter, melted

soaking syrup
1/2 cup sugar
1 cinnamon stick
2 2-inch slices of lemon peel
2 2-inch slices of orange peel
1/4 cup water
3/4 cup honey

Method:
 Place 2 cups of the raw and unsalted shelled nuts in the bowl of a food processor with 1/4 cup of sugar, ground cinnamon, nutmeg, cardamom, and cloves. Pulse until the mixture looks like coarse sand. Unwrap the phyllo dough and unroll so the sheets lie flat. They should be 13×17 inches. Cover with a damp cloth. Butter a 9×13 baking dish. Preheat oven to 350°F.

Set two sheets of phyllo dough on a large clean work surface and brush the sheet  with butter. Stack two more sheets of phyllo dough over the buttered folded sheet (line up the corners). Brush butter over on the stack of phyllo,

Sprinkle 1/3 cup of nut filling along the long edge of the dough stack leaving a little margin at the ends. From the nut end, tightly roll the dough up like a carpet so the nut filling is in the center of the roll. Using a sharp knife, cut the roll into equal-sized pieces . Arrange the pieces in the baking dish. Repeat until the baking dish is full. Brush butter over the baklava rolls and bake for 30-35 minutes until golden brown.

Make the syrup: While the baklava is baking, combine the sugar, cinnamon stick, lemon peel, orange peel, and water in a small saucepan over high heat. Stir to dissolve the sugar and bring to a boil. Let boil for about 15 minutes. Stir the honey into the sugar syrup and cook for another minute or two. Remove from heat. Remove the peels and cinnamon stick.

Finish the baklava: Have the syrup ready when the baklava comes out of the oven. While the baklava is still hot, pour the syrup over the pastries. Let the baklava cool completely (the syrup will pool at first, then the pastries will soak up the syrup). Sprinkle the remaing crushed nuts over the baklava. Makes approximately 35.

Sunday, December 14, 2014

Zuccotto

Yesterday was the wedding of Jai's one and only niece. She is very dear to Jai and us and we very much wanted to be part of her big day. But unfortunately, we couldn't make it to the wedding. Jai and Aishwarya were so down and disappointed; so to cheer them up I made a special dinner yesterday and to top it off I had made this chocolaty delight.
Zuccotto is an Italian chilled dessert. It can be frozen, then thawed before serving. This dessert is traditionally made in a special pumpkin-shaped mold (Zuccotto means "little pumpkin" in Italian). This is an easy and  fun dessert to make and it is good. Especially if you like chocolate  this is a dessert for you.


Ingredients:
Brownie-1 qty/ Pound cake / sponge cake  
Vanilla Ice cream - 2 cups or enough to fill the cup
Kahlua-1/4 cup
Chocolate syrup/ Nutella-4tbs/ Cocoa powder
Method:
Make brownie in a jelly roll pan, or if you want you can use a store bought pound cake or sponge cake. Line a bowl with plastic wrap. Trace the bottom of the bowl and cut it out and use it to line the bottom of the bowl.( If using a pound cake /sponge cake cut  crosswise into 1/3-inch-thick slices. Cut each slice diagonally in half, forming 2 triangles and use the triangles and line the bowl with it). Now cut long strips of brownie and line the sides of the prepared bowl. Brush some of the Kahlua over the brownie or cake lining the bowl. Reserve the extra brownie. Fill the brownie lined bowl with ice cream. Brush the remaining brownie/cake slices on one side with kahlua and arrange them, kahlua side down, over the ice cream, covering the filling completely and trimming to fit if necessary. Cover  Zuccotto with plastic wrap and refrigerate at least 3 hours and up to 1 day.
Invert the cake onto a platter. Remove the bowl and the plastic wrap.Pour slightly microwaved chocolate syrup/ nutella over or  dust with cocoa powder and serve.


Sunday, December 7, 2014

Vegetable Enchilada Soup

Winter is here again. And we are getting some much needed rains in California. There is something with the rains and the general cold weather that triggers in me a heightened level of appetite especially for things spicy. But considering the high calories that I would be consuming for Christmas and New Year season, I wanted to have some control on my cravings. Soups being healthy, filling and comforting, I made a big batch of this veggie loaded enchilada soup. This may not be the typical enchilada soup, as I have added orzo also into this. If you want to go with a more authentic version, you can skip the orzo.

Ingredients:
2 tablespoons vegetable oil
1 cup diced white onion (about 1 small white onion)
6 cloves garlic, minced
1/2 cup soy granules rinsed in hot water and drained
3 cups chicken stock/ vegetable stock
1 1/4 cups (or 1 10-ounce can) red enchilada sauce
1 (14-ounce) can black beans, rinsed and drained
1/4 cup Frozen corn
1 (14-ounce) can diced tomatoes, with juices (I prefer fire-roasted)
1 (4-ounce) can chopped green chillies
1/2 to 3/4 tsp teaspoon fresh  ground roasted cumin
1/2 cup mixed vegetables
1/2 cup orzo
4 ounces sharp cheddar cheese, freshly grated
1 teaspoon salt, or more/less to taste
Optional toppings: tortilla chips/strips, diced/sliced avocado, grated cheese, sour cream, chopped fresh cilantro
Method:
Heat the oil in a large stock over medium-high heat. Add the onion and saute for 5 minutes, or until cooked and translucent. Add the garilc and saute for an additional minute until fragrant. Stir in the soy granules and cook for an additional minute.
 Add  enchilada sauce, black beans, tomatoes, green chiles,mixed vegetables, corn,orzo, salt and cumin, along with the stock and stir until combined. Continue stirring occasionally until the mixture reaches a simmer. Reduce heat to medium-low and let it simmer stirring occasionally so that the soup does not stick to the bottom of the pan. Once it reaches the consistency of your liking stir in the cheese, until combined. Taste, and season the soup to taste with salt.
Serve the soup warm with desired toppings.

Thursday, November 27, 2014

No Bake Apple Butter Pie

Hope all of you had a happy and thankful Thanksgiving.
For this Thanksgiving along with with pumpkin pie and the pecan pie, I thought of making a lighter no-bake pie.
Here is the result of my experiment. We loved this and  I am planning to make this next year too or the next time I have craving for a pie. This is an entirely home made version because I think home-made is always better as you can make it to your liking. But if you are pressed for time, you can easily put this together using store bought crust and apple butter of your choice. Apple being a fruit available year-round, this is something you can make any time of the year.
 So enjoy!

For the Pie crust:
Ingredients:
1 1/2 cups graham cracker crumbs (from about 9 whole graham crackers)
1/4 cup packed brown sugar
1/2 teaspoon cinnamon, optional
Pinch of salt
7 tablespoons unsalted butter, melted
Method:

If you’re using whole graham crackers, finely crush them in a food processor or place them in a ziploc bag and roll with a rolling pin.
Stir graham cracker crumbs, brown sugar, cinnamon, and salt together in a large bowl. Add melted butter and stir with a fork.
Press mixture  into each ramekin or serving dish  to form a even layer along the bottom. Set the prepared crusts aside while you prepare the filling. I prefer chilling the  pie crust for at least one hour before filling. Cover if chilling longer.

For the Apple Butter:
Ingredients
2 lbs of good cooking apples (we use Granny Smith or Gravenstein)
1/2 cup apple cider vinegar (or substitute with water)
1/2 cups water
Sugar (about 2 cups, see cooking instructions)
Salt
1 teaspoons cinnamon
1/4 teaspoon ground cloves
1/4 teaspoon allspice
Grated rind and juice of 1/2 lemon
1/4 cup Butter
Method:
Pressure cook cored and peeled apples along with apple cider vinegar and water for 5 minutes. Puree the apples and add rest of the ingredients into a wide thick-bottomed pot(the wider the pan the better, as there is more surface for evaporation) and cook on medium low heat, stirring constantly to prevent burning. Scrape the bottom of the pot while you stir to make sure a crust is not forming at the bottom. Cook until thick and smooth.

Final assembly:
Spoon in the apple butter to the chilled crust and smooth out the top. Serve along with a dollop of whipped cream with a sprinkle of left over cookie crumb. Or if you are not a fan of whipped cream you can leave that out and serve with just the  left over cookie crumbs.

Sunday, November 16, 2014

Glazed Pumpkin Spice Bread


These are absolutely delicious. It is one of my favorite breads to make in fall.  I have made these for the fall season for past 5  years . This spice bread is  packed with  great flavor and is very moist.
Recipe source:Tammy's Recipes
Ingredients:
2 cups sugar
1/2 cup oil
3 eggs
1 1/2 cups canned pumpkin puree
1/2 cup freshly-squeezed orange juice
Zest of 1 orange
3 cups all-purpose flour
1 1/2 teaspoons baking powder
1 teaspoon baking soda
1/2 teaspoon ground cloves
1 teaspoon ground cinnamon
1/2 teaspoon ground nutmeg
1 teaspoon salt
Glaze ingredients:
3/4 cup powdered sugar
1 1/2 teaspoons ground cinnamon
1 teaspoon water
Method:
In a medium mixing bowl, beat sugar, oil, eggs, pumpkin, orange juice, and orange zest. Set aside. In a large mixing bowl, whisk together the remaining dry ingredients. Pour mixed wet ingredients into bowl with dry ingredients, and stir until no lumps remain.
Lightly grease and flour loaf pans or muffin pans. (This recipe will fill about 8 mini loaf pans, OR 2 regular loaf pans, OR 24 muffins.) Fill pans or muffin cups 3/4 full.Bake in a pre-heated oven at 375 degrees for about 15 minutes (muffins), 20 minutes (mini loaves), or 35 to 40 minutes (regular loaves). Check with a toothpick or fork (should come out clean).
Remove bread from pans and place on a wire rack to cool, covered with a clean towel. Mix powdered sugar and cinnamon in a small bowl. Add just enough water to make a glaze. Poke tops of bread with a fork or toothpick, and drizzle the glaze over the warm bread.
Slice bread with a thin serrated knife and serve warm, or allow bread to finish cooling, and store in a sealed bag or container.
Yield:
8 mini loaves, 2 regular loaves, or 24 muffins

Sunday, November 9, 2014

Potato Stew/ Ishtu


Today we had some friends home for  brunch. So I thought of treating them to a traditional appam and stew as this is something though typical Indian/ Kerala dish can be made not too spicy also to suit the non-Indian palate.  This stew goes well with chapathi, puri, puttu, idiyappam and even with bread. What I have shared here is the standard recipe with the normal spice levels; but if you want a milder version just reduce the number of green chillies in the recipe.
Ingredients:
Potato-3
Ginger sliced/diced -1 tbs
Onion -2 sliced
Green chilly-5
Curry Leaves-2 Sprigs
Thick Coconut milk-1 cup
Thin Coconut Milk-1 cup( If using canned coconut milk add 1/2 cup water to 1/2 cup coconut milk to make thin coconut milk)
Water-1/2 cup
Salt -to taste
Coconut oil-1 tbsp
Garlic- one finely chopped (optional)
Method
Pressure cook diced potatoes with enough salt , thin coconut milk and water for  2 whistle or 2 minutes after putting the weight, set this aside.
Heat one tbsp of oil  and  add onion,ginger,green chilli,garlic and 1 sprig of curry leaves and sauté till the onion turns translucent. To this add  cooked potato and mix well let it simmer for about 5 minutes
Add  thick milk , when the curry comes to a boil  switch off the stove and add  the remaining  curry leaves and close the pan for few minutes . Check the salt and if the curry is too thick  dilute it with some hot water.

Sunday, November 2, 2014

Kinnathappam Malabar Style (with eggs)

Kinnathappam is a favorite of mine - especially the Thrissur version of it. The typical Thrissur kinnahtappam is made with rice flour and it is something that can be made with no planning ahead. I was initially a little hesitant to try this as this had egg also in it as an ingredient. Why go for one more ingredient when you can have yummy kinnathappams without it?
But when I served the Thrissur kinnathappam's to my friend who was visiting, she told me that though she liked it, the Malabar kinnathappam that she is used to was also nice and it was almost like a jelly and kids would surely love it, especially  if served cold after refrigerating it for a while.
I tried this during the summer and it was different as she said and tasted nice also with a different feel to it - almost like tender coconuts, or jelly like.  If you haven't tried this, and if you like jelly like, melt in the mouth desserts, it surely is worth a try.
Ingredients:
Sona Masoori Rice / Basmati rice - 1 cup (or any raw rice)
Water-1/ 2 cup
Egg-1
Coconut Milk - 2  cups (thick)
Salt - 1/4 tsp
Sugar- 1 cup
Cardamom- 4  (powdered)
Ghee - 1 tsp
Ghee roasted almonds/cashews and raisins-1/4 cup

Method:
 Soak the rice for at least 3 hours.Make the rice into a fine paste with 1 cup coconut milk ,sugar,salt  and egg using a blender or grinder.( if your blender takes a long time and usually heats up the batter use cold coconut milk) Whisk in remaining coconut milk and water Strain with a cheese cloth or a fine mesh strainer strain this one more time. Add the powdered cardamom. The consistency of the batter would be that of milk if it is too watery add some all purpose flour(maida) and if too thick add more water .
 Heat water in a steamer. In a greased  steel plate or cake pan  stir the batter well and pour the batter into the greased plate,place  in the steamer , the thickness of the batter should be 1 and 1/2 inch( I had enough batter for two). After steaming for 5 minutes add the nuts and raisins and steam for another 25-30 minutes.
 Take the pan out of the steamer and let it cool. Cut into desired shapes and serve. Repeat the same with the remaining batter to make another plate of Kinnathappam.
Makes two 9" Plates

Sunday, October 26, 2014

Nasi Goreng

Nasi Goreng is a version of fried-rice of Indonesian origin. Traditionally it is served for breakfast, and is made with leftover rice. I made some rice and refrigerated it overnight to make this as typically I make only just enough and won't be having any leftovers. It is spicier than typical Chinese fried rice and so suited better for our taste-buds used to the spicy Indian cuisine.
Recipe source: Show me the curry
Ingredients:
Oil -2 tbsp
Butter – 2 tbsp
Garlic – 2 tbsp, minced
Eggs- 1. beaten
Rice – 1 cup raw rice cooked
Salt – to taste
Black Pepper Powder – to taste
Sweet Indonesian Sauce (Kecap Manis) – 3 tsp or as needed
Shredded Cabbage- 1/2 cup, packed
Green Beans – 1/2 cup, cut diagonally
Carrots – 1/4 cup, shredded
Bell Pepper (Capsicum) – 1/4 of Bell Pepper
Firm Tofu – 1/4 cup, cubed (optional)
Sambal – to taste 
Garnish
Egg-4

Method:
In a pan, heat the oil and add in the Butter and allow it to melt. While it is still melting, add in the minced Garlic. Add in the beaten Egg. Stir and cook.
Add in cooked and cold Rice. Mix and allow the Rice to heat up. Season with Salt and Black Pepper.
Add in Kecap Manis (Sweet Indonesian Soy Sauce) or soy sauce and 1 tsp sugar and mix till it has coated all the rice. Add in the Vegetables and Tofu and mix well till everything is incorporated well.
Add in Sambal and give it one final mix. Remove from flame and plate as desired.
In a small skillet, heat a tsp of Oil and make a fried egg, once done, season with Salt and Red Chilli Powder. Plate on the Nasi Goreng and serve.


Sunday, October 19, 2014

Gujiya / Karanji

With Diwali around the corner I wanted to post something sweet.
Karanjis are half moon shaped, fried pastries with sweet filling and with fluted ends. Though traditionally these are fried, this year I thought of making a healthier alternative since I was feeling a little guilty after feasting the last entire week celebrating my birthday.
WISHING YOU ALL A JOYFUL AND PROSPEROUS DIWALI!!
Ingredients:
Pie crust or store bought pie crust
Filling:
2 Cups - Sooji/Semolina
3/4 Cup - Mawa/Khoya (optional)
2 Cups - Powdered Sugar
1/2 tsp - Cardamom Powder
1/2 Cup - Grated Dry Coconut/Khopra (optional)
3 tbsp - Raisins
4 tbsp - Chopped Cashewnuts
2 tbsp -Almonds
Method:
Heat clarified butter in a non stick pan  ,add semolina and roast it for 5 minutes.Add chopped nuts and roast them for 5 minutes and take them out.In the same pan break the khoya into small pieces and fry till pinkish in color.In a bowl take all these fried ingredients ,mix with powdered sugar and cardamom and keep aside.
Make 15 to 20 balls from the dough.Take one ball
roll it slightly to the size of Puri and place it  in a greased gujiya or karanji mould. Place 1 tbs of filling on one side of the mould.Close the mould. Press the edges to seal gujiya well and remove excess dough portion from mould and keep it with rest of dough.make sure gujiya/karanji is sealed well, gently open mould and take out gujiya. Repeat same for rest of dough and prepare gujiya.
 If you don't have mould then roll dough and use a circle cutter or bowl to cut dough into round shape. Place filling and close gujiya forming half moon shape, press edges with a fork to seal and make impression or with hand pinch edges and seal it.
Brush gujiyas with some  melted ghee on the both sides this is optional and place  in a preheated oven 400F and bake for 18 minutes.Enjoy when cold.If you have leftovers you can store in a airtight container,and enjoy later.

Thursday, October 16, 2014

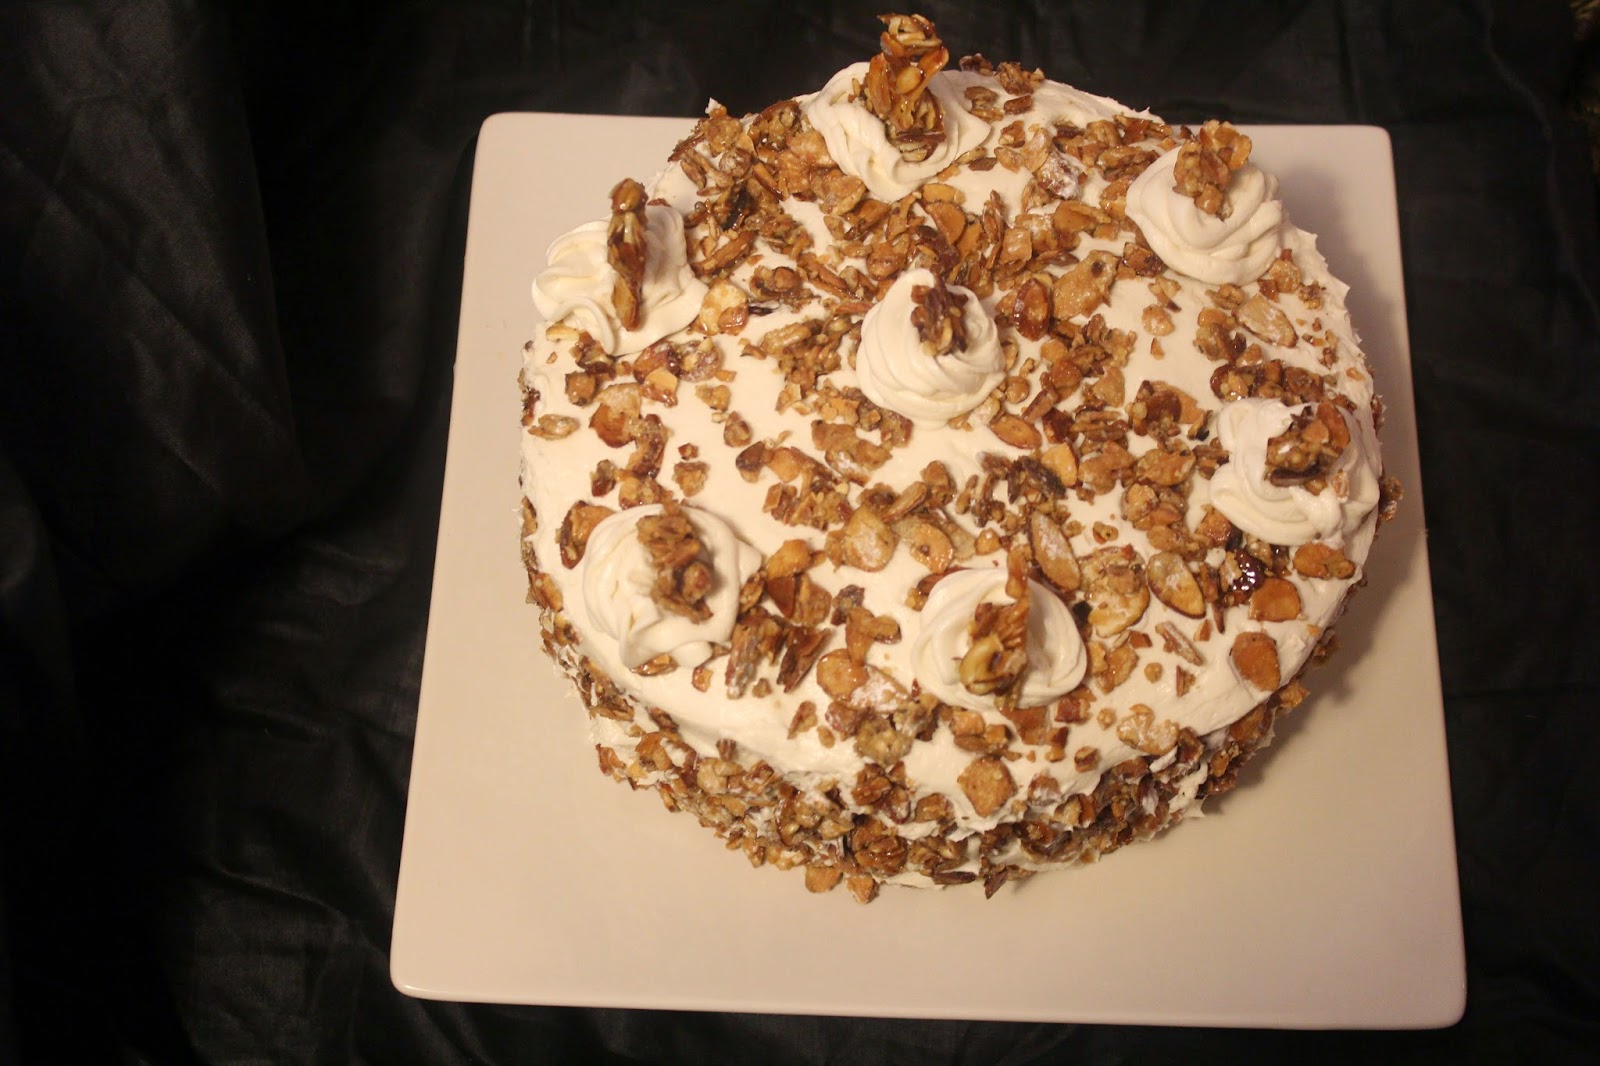
Burnt Almond Cake

It was my birthday today and as always Jai made the birthday cake.  This time as the cake was a bit lengthy and since I wanted to make sure that I get a good cake on my special day I helped him with it quite a bit (as I know he has this tendency to take for short cuts :)). Luckily, it was my day off and though I was nursing a cold, I couldn't keep myself away from all the action.
Don't be put off by the "burnt" in the name though. It is one of the yummiest cakes you would ever taste. This is considered one of the local specialties of San Jose and one of the best tasting American cakes. This is not the original recipe, but a combination of several recipes that I found online that I thought would turnout good.
Special thanks to all those bloggers who have put their recipes for this wonderful delight online.
Ingredients
For the Almond Cake:
4 extra-large egg whites
1 cup milk
2 tsp vanilla extract
1 1/2 tsp almond extract
3 cups  cake flour
1 1/2 cups granulated sugar
1 tbsp + 1 tsp baking powder
3/4 tsp salt
6 oz butter, at room temperature
Method:
To Make the Almond Cake:
Preheat the oven to 350 F. Line two 9” cake pans with parchment, and spray them with nonstick cooking spray.
In a small bowl whisk together the egg whites, 1/4 cup milk, and vanilla and almond extracts. Set aside.
In the bowl combine the flour, sugar, baking powder, and salt. Mix on low speed for 30 seconds to mix and sift the ingredients. Add the softened butter and the remaining 3/4 cup milk to the bowl, and mix on low speed until the flour is moistened. Raise the speed to medium and beat for 90 seconds.
Stop the mixer and scrape down the bottom and sides of the bowl. Add the egg white mixture in 3 parts, beating well after each addition. Scrape down the bottom and sides of the bowl once more. Divide the batter evenly between the pans.
Bake at 350 for about 25 minutes, until the tops spring back lightly when pressed. Let the cakes cool for 15 minutes, then gently invert them out of the pans, invert them again until they’re right-side up, and let them cool completely on a wire rack.
(Note: I have made this cake using a sponge cake also and it also turned out fine. So if you are not a big fan of almonds and almond essence, you can go for a plain sponge cake instead)

To Make the Caramelized Almonds/Burnt Almonds.....

In a large cast iron skillet toast 1 8oz package of sliced (not slivered) almonds.
Then sprinkle 1 Cup powdered sugar over almonds.
Stir constantly as not to burn the almonds.
Once the sugar is melted, add another 1/2 C. of powdered sugar to the almonds.
Your almonds should be brown in color and the aroma should be sweet toasted nuts.
Take off the heat and then spread on a cookie sheet lined with parchment paper to cool

Pastry Filling
Ingredients:
2 eggs
1 cup of cream
1/2 cup Milk
1/2 cup of sugar
1/2 tsp vanilla

Method:
Put all in top of double boiler and cook whisking for about 5 minutes, until it is thick and pudding like, will coat the back of the spoon, place in dish to cool for a couple of hours...put plastic wrap directly on top to prevent a skin from forming on top of the filling.....
place all ingredients in the top of a double boiler....
and cook, stirring until thick.....

or in if in a hurry you can mix 2 cup. heavy whipping cream and a small box of French Vanilla Instant pudding.

To Make the Simple Syrup:
Combine the water and sugar in a small saucepan over medium heat. Stir them together until the sugar dissolves, and heat the sugar syrup until it just starts to boil. Remove it from the heat and let it cool to room temperature. Stir in the amaretto or almond extract.

To Make the Almond Buttercream:
Ingredients:
1/2 cup all-purpose flour
1 1/2 cups milk
12 oz butter
1 1/2 cups granulated sugar (I used superfine so it dissolved quickly)
2 tsp vanilla extract
1 tsp almond extract
1/4 tsp salt

Method:
In a bowl, whisk together the flour and milk. Pour it through a fine wire mesh strainer into a medium saucepan, straining out any flour clumps. Heat the flour mixture over medium heat, whisking constantly, until it thickens. It will go from being a thin liquid to being a very thick paste. It should have the consistency of a very thick pudding when you’re done. Remove the pan from the heat, and let the flour mixture cool completely. To speed this process, put this in the freezer for a little while. Stir occasionally while the mixture cools.
Combine the butter and sugar in the bowl of a large stand mixer fitted with a whisk attachment. Beat the butter and sugar together on medium-high speed until very light and fluffy and no longer gritty, about 5-7 minutes.
Once the flour mixture is no longer warm at all, and the butter/sugar is light and fluffy, add the flour to the mixing bowl, along with the vanilla extract, almond extract, and salt. Whip together for 2-3 minutes until well-combined, light, and fluffy. If it seems to separate continue to beat it until it comes back together.
Assembly:
Using a large serrated knife, cut each cake layer in half. Place one layer on a cake cardboard (or your serving plate) and use a pastry brush to brush it generously with the simple syrup.
Scoop some buttercream into a pastry bag fitted with a 1/2-inch round tip. Pipe a ring of buttercream all along the edge of the cake round to act as a barrier and hold in the filling. Scoop 1/3 of the pastry cream onto the cake, and spread it in an even layer until it covers the cake and reaches the buttercream ring. Top the cake round with a second round, and repeat the process of brushing it with simple syrup, piping a ring of buttercream, and spreading the pastry cream in the center.
Repeat with the remaining layers, until you have a 4-layer cake with 3 layers of buttercream. Spread buttercream along the sides and top of the cake. It doesn’t have to be super-smooth since most of the surface will be covered with almonds.
Press caramelized almonds into the sides of and the top  the cake .
Fit a pastry bag with a large star tip and pipe rosettes along the top of the cake. Decorate them with more caramelized almonds, if desired.

Sunday, October 12, 2014

Slow Cooker Steel-Cut Oatmeal


This recipe is for those busy and cold days when you need a hot and healthy homemade breakfast without much effort from your side. The slow cooker does all the work. You can make several days' worth. Cooked oatmeal can be refrigerated and warmed up in a microwave easily. What I love about this is that each family member gets to dress up their bowl with their favorite toppings! It is so yummy, it could almost be a dessert.

Ingredients :
Steel cut oats-1 cup
Water- 4 cups
Butter- 1/2 tsp
Salt-1/4 tsp
Milk- 1& 1/2 to 2 cups

Method:
Coat the insert of the slow cooker with a thin layer of butter. Add the water, oats,  and salt and stir to combine.
Cover and cook on high until the oats are cooked through and creamy, about 4 hours. Add the milk and stir .
Serving suggestion:
We love to have the oats with a sprinkle of some cinnamon brown sugar or plain brown sugar or coconut sugar, along with some raisins and nuts. Some other toppings we love are: craisins, sliced almonds, coconut flakes, maple syrup and dried raspberries.
Any leftovers can be refrigerated and then nuked as needed.

Sunday, October 5, 2014

Pineapple kesari /Pineapple semolina pudding

Here is a delicious pineapple infused kesari that I made to sweeten our Navarathri  celebration. Though it is called a kesari, which means saffron, this recipe doesn't use kesari.The yellow color is ob obtained through using pureed ripe pineapple. But if you want a more vibrant yellow you can use saffron or even food color.
Ingredients:
Rava / Semolina - 1 cup 
Sugar -1&1/2 to 2 cups 
Pineapple- 1 cup 
Raisin- 1/4 cup (optional)
Cashew nuts- 1/8 cup (optional)
Ghee-1/4 cup 
Vegetable oil- 1/4 cup
Pineapple essence (Optional)- 2 drops 
Salt A pinch 
Water- 2 & 1/2 cups 

Method
Cut pineapple into fine pieces. Puree half of the pineapple into fine paste,set aside. Heat a pan with ghee and oil and if you are using cashew nuts and raisins saute them till cashew turn golden and raisins turn plump. Remove and set aside  Add the rava and roast until the raw smell goes off. 
Add hot water  to the roasted rava along with the salt.  Mix well till all the water is mixed in well
Cook covered for 4 minutes or until done in low flame. 
Add sugar and color and essence if using. Mixture will turn watery again.
Add the pineapple and the puree. Keep mixing until the kesari starts leaving its sides. Mix in the cashew and raisins if using transfer to the serving bowl.

Sunday, September 28, 2014

Pavakka/Kaipakka/Bitter gourd Kondattam Easy'N Healthy

Today I thought of sharing an easy, healthy and quick recipe for Pavakka/Kaipakka Kondattam. Typically making  kondattam  is a long process; the veggies  used  are marinated and sun dried and the process needs to be repeated for a few days. The veggies preserved as kondattam are later fried in oil before they are used. In this quick version there is no frying and no waiting for days before it is dry enough to fry. So if you are longing for some quick and healthy version without compromising the taste, I would recommend trying this. I am sure you will surely fall in love with this. 
Ingredients
1 medium size - Bitter gourd
1/2 tsp - Red chili powder
1/2 tsp - Turmeric powder
2 to 3 tbsp - Greek Yogurt / Sour cream
1/8 tsp -Hing Asafoetida
2 tsp -Oil
salt to taste

Method
Cut bitter gourd to thin round rings. Mix all the ingredients together. Grease a microwave-safe plate. Arrange bitter gourd on the plate in a single layer. You will need to microwave for 9 to 11 minutes. depending on the power of your microwave. Don't cook for 9 minutes at one go. Cook for 2 minutes, stop, stir the rings and repeat for 2 minutes  for four times (8 minutes in total). Now microwave for 1 minute   then check if bitter gourd is crisp. If not microwave for 30 seconds and check if needed repeat another 30 seconds. My bitter gourds were crisp at 9 minutes.

Sunday, September 21, 2014

Summer Delight

This was a salad that I put together with whatever ingredients I had in my pantry on a warm summer day. It turned out to be such a hit with my family that this and its variants have become  almost a regular go to salad in our diet. What makes it so delicious is the way the different tastes and flavors complement each other. We have tried variants of this substituting watermelon with apple, strawberry, pineapple and pear and also trying it out with spinach in place of lettuce.

Ingredients:
Lettuce- 4 cups
Avocado-1
Watermelon-2 cup
Onion-1/2 cup
Feta cheese-1/4 cup
Pepper flakes-1tsp
Black pepper-1/2 tsp
Salt-1/4 tsp
Garlic- 1 crushed
Lemon-2 tbs
Method:
Mix together everything and serve. I prefer mixing feta towards the end of mixing.


Monday, September 15, 2014

Cream Caramel / Flan (Pressure Cooker)


Today Jai and I celebrated our 14 years of marriage. To sweeten an already sweet day I prepared
Cream Caramel / Flan in the pressure cooker. This method is faster than the oven method. Taste-wise I think both versions taste the same.

Ingredients
1 1/2 cups sugar
2 tablespoons water
1/2 lemon, juiced
2 cups heavy cream/Half &Half/Whole milk
1 vanilla bean, split and scraped
5 eggs
Pinch salt
Method:
To make the caramel: have ready a 2-quart round flan mold . Combine 1 cup of the sugar and 2 tablespoons of water in a heavy-bottomed pot or pan. Place over medium-high heat and cook until the sugar begins to melt. Swirl the pan over the heat until the syrup darkens to a medium amber color, about 10 minutes; don't stir with a spoon. Remove from the heat and immediately add the lemon juice, swirl the pan again to combine, and then pour into the flan mold. Tilt the dish so that the caramel evenly coats the bottom and a bit up the sides, place in the roasting pan and set aside.

Microwave the cream to room temperature.In a large bowl, cream together the whole eggs with the remaining 1/2 cup of sugar; add a pinch of salt. Whisk until the mixture is pale yellow and thick. Add egg mixture to cream ; Add vanilla. Pass the mixture through a strainer into a large measuring cup to ensure that the flan will be perfectly smooth. Pour the custard into the caramel-coated mold cover with an aluminum foil. Place in pressure cooker which has 2 inches of water in bottom. 
Cook for 20 minutes after the placing the whistle/weight after steam starts to escape.  If you are cooking the flan in individual cups or ramekins pressure cooking time can be reduced to 7 to 8 minutes.Let the pressure release by itself do not force release and open the cooker.

 Let the flan cool in the water bath, then refrigerate for at least 4 hours or overnight.

When you are ready to serve, run a knife around the inside of the mold to loosen the flan. Place a dessert plate on top of the flan and invert to pop it out.

Saturday, September 6, 2014

Pazha Pradhaman

It is the Onam season again! Onasamsakal to all my friends who are celebrating Onam!
If you are in Kerala during this time of the year, you would be seeing bananas (or plantains as they are called in the US) in every shop and in every house. This is the season for nenthrappzham - it is used for making banana chips, paysam, pazham varattiyathu, sharkara varatti, pazham nurukku and in many other forms.
Here is a delicious payasam recipe using bananas to sweeten your Onam this year.

Ingredients :
Ripe banana/Nenthrappazham- 3
Jaggery -  300gm
Ghee : 5tbsp
Dried Coconut Slices -1/4 Cup, cut into thin slices
Cashews - 1tbsp
Raisins - 1tbsp
Roasted cumin Powder / Dry ginger and cardamom powder- 1/2tsp
Thick Coconut milk - 3/4 Cup
Thin coconut milk -3 Cups

Method:
Make a syrup of jaggery  by adding water and filter the syrup and set aside.
Pressure cook the skinned bananas and keep aside to cool. Mash the cooked banana, there should not be any lumps.
In a heavy bottom vessel, heat 3tbsp of ghee and golden fry the dry coconut slices, cashews and raisins ,set this aside. Add the mashed banana along with the remaining ghee along cook till it starts to thicken. Now add the jaggery syrup. Keep stirring when it becomes the consistency of fruit jelly add 2 cups of  thin coconut milk. When it start to boil add cumin powder( if you prefer the aroma of cardamom and dry ginger add it instead but at the end.) mixed in the remaining 1 cup of thin coconut milk. When the pradhaman stats to get thick remove from the stove and add the thick coconut  milk . Finally garnish it with the fried coconut slices, cashews and raisins. Pazha Pradhaman tastes best when cold.


Thursday, September 4, 2014

Fruit filled sponge cake

Today is Jay's birthday and he wanted a cake that is not overly sweet.  As mentioned earlier he doesn't like anything too sweet.  And so I thought why not make him a fruit cake with whipped cream which is sweetened to his likeness.  So here is the cake I baked, it is not too sweet and  heavy as the usual butter cream or cream cheese cakes.
As expected Jai loved his cake and  even had a second helping. So if you or your loved ones love a 'not so sweet' cake that is light and refreshing give this a try.
Happy Birthday Sweetheart !
Recipe Source: Woodland bakery
Ingredients for the cake:
Large Eggs at room temperature-4
Granulated  sugar-2 cups
Whole Milk 1 cup
Unsalted Butter 8 Tablespoons
Vanilla Extract  1 Tablespoon
All Purpose Flour -2 cups
Baking Powder -2 teaspoon
Salt -1/4 teaspoon

 Method:

In the bowl whip the room temperature eggs on high speed with the whip attachment until foamy, then gradually start adding in your sugar very slowly.

The eggs will take about 5 – 7 minutes to reach the ribbon stage, so in the meantime you can heat your milk and butter together in the microwave or on the stove top  and reserve to keep warm- you will want to add this to the mixture  while it is still warm/hot.

Also have your flour and baking powder and salt sifted together to aerate and lighten.

The ribbon stage is a stage where the egg/sugar mixture is very light in color, very thick and when lift your whip attachment and the batter runs back into the bowl it makes a ribbon effect before disappearing back into the mixture. You can also do a “figure 8″ pattern with the mixture and if it stays visible for a few seconds before disappearing you know you have achieved ribbon stage.

At this point add in all of the dry ingredients at once with the mixer OFF first  and then on low speed mix in the dry mixture.  You can gradually go up to a higher speed to make sure it is all incorporated evenly.

Next you will prepare a liaison with the hot milk and melted butter mixture. A liaison is a technique in which rather than dumping the liquids straight into the main batter causing deflating of this delicate foam we took such care to achieve;  you will take out about 2 cups of the cake batter into a separate mixing bowl, and with a hand whisk add the hot liquids to THAT 2 cups of batter.  Whisk it all together and then proceed to add this liaison to the orginal cake batter in the  bowl.

Add the vanilla extract last and pour into prepared pans.

Bake this cake at 350 degrees F for about 25 minutes, then lower the temperature to 325 F to continue baking UNTIL IT’S DONE !


The cake is done when you gently press the center and it springs back immediately.


Also, this cake recipe is a foaming egg sponge, so it is naturally going to be a DRY  cake due to very low amounts of fat in the recipe.
It lends itself nicely to having a Simple Syrup brushed on the layers to add moisture

Ingredients for the Frosting:

2 teaspoon unflavored gelatin
8 teaspoons cold water
2 cup heavy whipping cream (35%)
1/2cup sifted icing sugar (confectioners sugar)

Method:
In a small microwaveable bowl, combine gelatin and cold water; let stand until thick. Microwave the gelatin for 10 seconds,cool (do not allow it to set).
Whip the cream with the icing sugar, until slightly thick.While slowly beating, add the gelatin to whipping cream.Whip at high speed until stiff.

Final steps:
Chop up some fruits and mix it to one cup of whipping cream Remember to leave a good amount for frosting the tops and sides of your cake!!

Once your cakes have cooled, take a serrated knife and cut into each one. Take your fruit filling and begin to assemble your cakes, one layer at a time. Frost the tops and sides and decorate with fresh fruit/berries of your choice. Drizzle tops with the simple syrup. Place in fridge until ready to eat.

Friday, August 29, 2014

Elai Ada


Elai ada is made as an offering on Uthradam  and Thiruvonam day to Lord Vamana and the King Mahabali. Today being Atham, the beginning of Onam festivites  and also being Ganesh Chaturthi, I made this delicacy as an offering to Lord Ganesha. Elai ada can be made with rice flour also. The method for making it with rice flour is the same as that of making the Modak covering posted earlier. The method posted today uses ground rice, I find Ada made this way softer and tastier.

Recipe Adapted from: Ammupatti's thought
Ingredients:
Fresh grated coconut: 2 cups
Jaggery: 1 and 1/2 cups
Cardamom powder:1/2 tsp
Ghee:1tbs
Raw rice: 1 cup
Parboiled rice: 1 cup
Vegetable oil: 1 tbsp
Banana leaves- I used 9 pieces ( 8x8 inch pieces)
Salt: a pinch

Method:
Soak the rice for 5 hours and grind to a thick smooth paste. Add the salt . It should be of spreading consistency. Add the oil to this paste and mix well.

Make a syrup using the jaggery. Now strain this syrup and add the coconut to it this. Keep stirring and cooking until all the water is absorbed.  At this stage add the ghee and stir till  the contents leave the side of the pan. Remove from fire and add cardamom powder.

Trim off the tough side of the leaf, run the leaf quickly over a flame to soften it and make it more pliable. When it changes from dull to shiny, it is soft enough.

Now take each leaf, spread a ladle full of rice flour as a thin layer. Now, spread 2 tbsp of prepared filling on top of this layer, but covering only about ¾th of the layer. Fold the banana leaf into half, place it in a steamer. Repeat for all the leaves, and steam for 25-30 minutes. When it is done, the Ada should not stick to the leaf when opened.

Sunday, August 24, 2014

Devil’s Food Layer Cake

Today Aishwarya turned thirteen and to celebrate her officially turning a teen I made this cake. This cake was super chocolatey,and so delicious. Add to that the decoration part is super easy. This tastes awesome with  a big glass of milk to go with it . If you are a chocolate fan or need a mood booster do try this out. The cake sure made me feel better, even after realizing that I was now the parent of a teenager.
Happy Birthday to my beautiful daughter! It's hard to believe that you are 13 already, I am so proud of you.  Love you to the moon and back
Recipe source: Williams Sonoma
Ingredients:
 For the cake:
1 cup boiling water
3/4 cup unsweetened natural cocoa powder
1 3/4 cups all-purpose flour
1 1/2 tsp. baking soda
1/4 tsp. fine sea salt
2 cups granulated sugar
10 Tbs. (1 1/4 sticks) unsalted butter, at room temperature
3 eggs
1 tsp. vanilla extract
1 1/4 cups buttermilk

For the chocolate frosting:
3 3/4 cups confectioners’ sugar
1 cup unsweetened natural cocoa powder
8 Tbs. (1 stick) unsalted butter, at room temperature
1 tsp. vanilla extract
1 cup heavy cream /Sour cream , or as needed

Decoration:
Maraschino cherries  as needed
Pirouette cookies
Method:
To make the cake, preheat an oven to 350°F. Lightly butter two 9-inch round cake pans. Line the bottom of each pan with a round of parchment paper. Dust the pans with flour, tapping out the excess.

In a small heatproof bowl, whisk together the boiling water and cocoa powder until smooth. Let cool completely.

In a bowl, sift together the flour, baking soda and salt. Set aside.

In a large bowl, using a handheld mixer, beat together the granulated sugar and butter on medium-high speed until the mixture is light in color and texture, about 3 minutes. Beat in the eggs, one at a time, then beat in the vanilla and the cooled cocoa mixture.

Reduce the speed to low and add the flour mixture in 3 additions, alternating with the buttermilk and beginning and ending with the flour mixture. Beat until smooth, stopping the mixer occasionally to scrape down the sides of the bowl. Divide the batter evenly between the prepared pans and smooth the tops.

Bake the cakes until they begin to pull away from the sides of the pans, 35 to 40 minutes. Transfer the pans to wire racks and let cool for 15 minutes. Run a knife around the inside of each pan to release the cake. Invert the pans onto the racks, lift off the pans and peel the parchment paper off the cakes. Turn the cakes right side up and let cool completely.

Meanwhile, make the chocolate frosting: In a bowl, sift together the confectioners’ sugar and cocoa powder. Using the mixer, beat in the butter on low speed until it is crumbly. Beat in the vanilla, then gradually beat in enough of the cream/ sour cream to make a spreadable frosting.

Place 1 cake layer, bottom side up, on a cake plate. Using an icing spatula, spread the top of the layer with a generous 1/2 cup of the frosting. Place the second layer, top side down, on top of the first layer. Frost the top and then the sides with the remaining frosting. I decorated the top with cherries and around the cake with pirouette cookies Slice the cake into thick wedges and serve. 

Tuesday, August 12, 2014

Thin crust Pizza

Friday nights are pizza nights at our home. We love to have variety, so we always try different versions like thin crust /thick crust as well as different toppings. Mostly this thin crust is the base when I make thin crust pizza. The toppings are typically based on what we feel like having that day or what I have in my pantry.
Recipe source: Tammy's Recipes
Crust Ingredients:
1 cup warm water (110 degrees)
1/2 teaspoon salt
2 to 2.5 cups bread flour (or all-purpose flour)
2 teaspoons active dry yeast

Sauce Ingredients:
1/3 cup Light or Fat Free Italian salad dressing
2-3 cloves minced garlic
1/2 teaspoon salt
dash of black pepper
or you can just use pizza sauce of your choice

Toppings:
3-4 cups (12-16 ounces) shredded mozzarella cheese
1/3 cup Sun Dried tomatoes
1/2 to 3/4 cup crumbled feta cheese
1/3 cup diced onions, optional
1 cup (or one small handful) fresh baby spinach leaves
1 medium-large Roma tomato, diced
Crushed red pepper, for serving (optional)
Parmesan cheese, for serving (optional)

Method:
 To make pizza crust, combine warm water and salt in a mixing bowl. Add about 2 cups of the flour, along with the yeast, and stir until a sticky dough forms. Add more flour as needed, and knead dough with clean hands until a soft, elastic dough forms. Knead for 5 minutes or so.
 Liberally butter a 16-inch round pizza pan. With clean buttery hands, spread and press the dough into the pan to form a pizza crust.

 Mix sauce ingredients together and spread over the dough. Sprinkle toppings on.  The toppings are listed  in the order  that is preferred to add them (sun dried tomatoes can get too dark if they're added last; the spinach shrinks substantially as it cooks and will look like a lot less in the end!).

If you like a thinner crust, pre-heat oven and bake immediately. If you prefer a slightly thicker/fluffier crust, allow pizza to rest for 15-20 minutes before baking.

 Pre-heat oven to 450 degrees. Bake pizza for 10-12 minutes, until the crust is browned on bottom and the toppings are hot and bubbly.

If  using a thinner, non-stick pizza pan, bake it on the top oven rack. For a heavier/thicker stainless steel pan, use the bottom oven rack to ensure that the crust gets fully cooked.
 Remove pizza from oven; cut into slices after about 5 minutes. Serve with crushed red pepper and Parmesan cheese if desired.

Monday, August 4, 2014

Spicy Orange Tofu

For the vegetarians who are looking for a veggie version of spicy orange chicken, here is a good recipe you can use. Though you can buy the sauce for this in some stores, it isn't that difficult to put together the sauce yourself as most of the ingredients would be there in almost any kitchen or can be acquired easily. I know you would all agree when I say home made is always better than store-bought. So why wait? Go try this tomorrow. This goes well with fried-rice or with Indian breads like chapati.

Ingredients for Sauce
1 cup chicken broth/veggie broth
1/2 cup freshly squeezed orange juice
1/2 cup sugar
1/3 cup distilled white vinegar
1/4 cup soy sauce
2 cloves garlic, minced
1 tablespoon orange zest
1 teaspoon Sriracha, or more, to taste; can be substituted with chilli paste
1/4 teaspoon ground ginger
1/4 teaspoon white pepper
Method:
To make the marinade, whisk together chicken broth, orange juice, sugar, vinegar, soy sauce, garlic, orange zest, Sriracha, ginger and white pepper in a large bowl. In a medium saucepan over medium heat. Bring to a boil and stir in 2 tablespoons cornstarch combined with 2 tablespoons water. Cook, stirring frequently, until thickened about 1-2 minutes; keep warm.

Rest of the ingredients:
1 block firm tofu, pressed
For cooking:
2 Tbsp canola oil
4-6 cups fresh or frozen veggies (carrots, broccoli, onion, peppers, spinach, summer squash, bok choy, etc.)
Method:
To press tofu, place block of tofu on cookie sheet, cover with foil, and weigh it down with a heavy pan (I use a large cast iron skillet). Let press for about 1/2 hour, and add a few more pounds of weight - cans of beans or veggies work great. Let press for at least another 1/2 hour. This will drastically improve the  texture of your  tofu. Cut tofu into small (1/4 in) cubes,  heat a wok or large frying pan with 2 Tbsp canola oil. Add tofu -and cook over high heat until lightly browned tofu. Add veggies as desired ,cook, stirring often, until veggies are just cooked through. Stir in the sauce. Serve with rice or noodles. Makes 3-5 servings

Sunday, July 27, 2014

Starbucks Double Chocolaty Chip Frappuccino

Here is quick and yummy copycat Starbucks Double Chocolaty Chip Frappuccino. This will surely quench your thirst and cool you down. I hope you will enjoy it as much as we did.
Ingredient:
 2 Tbsp Hot Water
1 to 2 Tbsp Instant Coffee
 1 to 2 Tbsp Sugar
(Mix all of the above ingredients together in a bowl and let dissolve)
 1 Cup Milk (any variety)
 2 Cups Ice (more or less depending on how frothy you like it)
 1/4 Cup Chocolate Syrup
 1/2 Cup Chocolate Chips
1/2 tsp Vanilla Extract
Method:
Put everything in a blender and blend away .Serve with whipped Cream ,chocolate sprinkles/ chocolate syrup.

Monday, July 21, 2014

Mexican Pizza

Here is my version of  a delicious Mexican pizza. Try this once and I am sure you will make this often. This can be a filling lunch,dinner or any time snack.
Ingredients
8 (6-inch) flour tortillas
1 (16 oz) can no-sodium black beans, drained
2 tomatoes chopped fine
1/4 tsp cumin powder
1/2 tsp paprika powder
1/2 red bell pepper, sliced thinly
1/2 green bell pepper, sliced thinly
4 oz mushroom, sliced thinly/4 oz soy granules
1/4 red onion, sliced thinly
3 cloves of garlic
1 1/2 cup shredded Mexican blend cheese
Sliced avocado and cilantro for topping
Lime juice
Method:
Heat oven to 350°F.
Brush a baking sheet with 1 tablespoon of the oil and arrange tortillas in a single layer. Bake 5-6 minutes or until browned slightly.
While tortillas bake, heat remaining oil in a skillet and cook onions until translucent. Add garlic and tomatoes and saute till the tomatoes break down to a mushy consistency. At this stage add paprika and cumin powder I sometimes even add chicken masala powder in place of cumin and paprika, add the soy granules now if you are using them saute for another 2 minutes. Now add beans and partially mash with a potato masher or the back of a fork.
Remove tortilla pizzas from oven and top each with bean mixture, spreading evenly. Top with cheese. Distribute veggies evenly. Bake until cheese has melted and crust turns crispy and lightly browned, approximately 10-15 minutes. Serve with cilantro and avocado. Lime juice really brightens up the dish.

Sunday, July 13, 2014

Milk Halwa

I had been away travelling the past two weeks. So on my come back, I thought of re-starting with a sweet treat. This milk halwa is quick and easy to make, yet there is no compromise on taste.
Recipe adapted from A Tasty Challenge
Ingredients:
Milk-3 Cups
Milkmaid-1- 14 oz can/ 397 gm can
All Purpose Flour-3/4 Cup
Tapioca Flour-1/3 Cups
Sugar-2 Cups
Ghee-.1 Cup
Cashew Nut pieces-1/3 Cup
Cardamom Powder-1/2 Teaspoon
Method
Dissolve Flours in 3 cups of Water and strain it into a wide pan.Mix in milk milkmaid and the Sugar Put this on  medium heat and stir continuously till thickened.
When you are able to see the bottom of the pan while stirring.Add the Ghee and continue cooking. Once it starts to leave  the sides, add Cashew nuts and mix well.
When you see small droplets of Oil  oozing out and the Halwa is coming together as a mass, mix in the Cardamom Powder.
Remove it into an oiled pan and level the top off with the back of an oiled spoon.
Let it sit at room temperature and cool completely before cutting it into pieces and serve at room temperature.

Sunday, June 22, 2014

Spinach Dosa and Garlic Chutney

Here is a delicious, veggie loaded dosa for all the dosa lovers out there. This goes well with garlic chutney and sambar along with the potato filling(masala). Try this out yourself and let me know how you like it.
For Dosa
Ingredients:
Dosa batter -2cups
Spinach puree/paste-1/2 cup ( take fresh clean spinach and grind to smooth paste)
Salt -1tsp
Method:
Mix dosa batter along with spinach paste.Add water if needed to get a pouring consistency add  salt. Heat a Non Stick Pan and take a laddle full of batter and spread it in circles, this has to be done quickly. It is a skill which comes with practice, spread little butter or ghee or oil around the edges. Roast the dosa on medium flame and then reduce the heat.When dosa  turn golden brown in color   fill with several tablespoons of the potato filling  roll up and serve immediately with sambar and chutney.
For Garlic Chutney
Ingredients
Garlic -3/4 cup
Tomato paste-2 tbs/2 medium tomatoes
Red chili - 4
For seasoning
Oil  – 1 table spoon
Mustard -1 teaspoon
Red chilli-1
Curry leaves -few
Method:
In 2 tablespoons of oil sauté the chilies first and remove it from the oil. Then sauté the garlic and tomatoes n till the garlic turns translucent. Finally add salt as needed. When this cools down grind it to a paste.My chutney was too thick so I ended up adding 1/4 cup of water. Heat oil ,add the mustard seeds and then when it splutters add dry red chilly.Add this to the chutney and mix

Sunday, June 15, 2014

Quick Fix Tiramisu Parfaits

Today being the Father's day, Aishwarya and I thought of indulging Jai with all his favorite foods.We had home made waffles and berry syrup for breakfast. We had a quick lunch from outside after the father- daughter and mother movie date. After the movie, lunch and shopping I didn't have much time nor energy. I had planned on making his favorite Biriyani and Tiramisu for dinner. I didn't want to experiment with the biriyani so I made it the way I always does. But I was a bit more daring with the Tiramisu -  I thought  after all, what can go wrong with Liqueur cake and pudding .Just as  I figured it turned out quite good. I am not promising you the real tiramisu but this sure is a delicious quick fix substitute for Tiramisu.
Happy Father's day to all the awesome dads out there.  Today I feel so blessed to be having such awesome dads in my life: an awesome Father,Father-in-law, Grandfathers and a wonderful dad for my daughter.
Ingredients
2 cups milk
2 3/4 ounces vanilla pudding mix
1/2 cups brewed coffee, cooled
1 (16 ounce) frozen Schlunder Liqueur Cake , cut into 3/4-inch cubes( I used only half the cake)
1 tablespoon cognac/Coffee liqueur
1 teaspoon unsweetened cocoa powder
1/2 cup grated chocolate, optional
Whipped cream, for serving
Method:
In a  saucepan, stir together the  2 cups milk and the vanilla pudding mix over medium heat. Bring to a boil, stirring constantly. Let cool for 5 minutes.
Pour the coffee into a shallow dish pour in the cognac or coffee liqueur. Dip the cake cubes into the coffee mix, turning to coat.  Place  the cake cubes in  parfait glasses; drizzle with half the coffee mixture.  Cover with half the pudding mixture, then 1/3 of the grated chocolate. Repeat if needed.Refrigerate 4 hours Before serving top with  whipped cream. Dust with the cocoa powder and serve

Sunday, June 1, 2014

Italian Cream Soda with Homemade Syrup

I typically go for Italian soda when we dine Italian. I had been thinking of recreating it for some time now.
With the thermometer showing the north of 90s on many days, now was a good time to try this out. The best thing about this is that since we are using home made syrup, it tastes way better than the restaurant ones. You also can control your calorie intake by reducing the sugar content in the syrup or by substituting cream with whole milk and still have an awesome drink.
Recipe adapted from: Curly girl Kitchen
Homemade Berry Syrup
Ingredients:
1 cup water
1 cup granulated sugar
2 cups berries ( Any berry would do)
Method:
Combine the water and sugar in a medium saucepan.  Bring to a boil over high heat and stir to dissolve the sugar.  Add the berries, return to a boil, then reduce to medium heat.  Boil for 10 minutes.  Reduce to low and simmer for 10 more minutes.
Remove from the heat; pour through a mesh strainer, pressing the fruit with the back of a spoon to extract all the liquid.  Store in the refrigerator in a glass jar until chilled and ready to use. Yields 1 and 1/2 cups syrup

Italian Cream Sodas
Ingredients:
Ice
1-2 tablespoons syrup
Club soda
Splash of cream, half 'n' half or whole milk
Method:
Fill a tall glass halfway full of  ice.  Pour the syrup over the ice,add more if you like it sweet.  Add the club soda, filling an inch from  the top of the glass.  Add the cream . Enjoy

Sunday, May 18, 2014

Vanilla Crepes

This is the breakfast that Aishwarya and Jai whipped up for mother's day. What I love about crepes is that you can make these is no time and make them the way you want...  A touch of sugar and vanilla makes great sweet crepes...some pepper and herbs make great veggie crepes. Both  are great for breakfast! Aishwarya and Jai made the sweet version; filled the crepes with my most favorite fruit of all,  mangoes and served me with a generous amount of whipped cream,just the way I love them. I couldn't take a better  picture as Aishwarya was urging me to taste it as she wanted to know how I liked it.
Ingredients:
 1 1/2 cups milk
 2 eggs
 2 tablespoons vanilla extract
 1 1/2 cups all-purpose flour
 2 tablespoons sugar
 1/2 teaspoon salt
 5 tablespoons melted butter
Method;
In a large bowl, mix together the milk, eggs and vanilla. Stir in the flour, sugar, salt and melted butter until well blended.
Heat a crepe pan over medium heat until hot. Coat with vegetable oil or cooking spray. Pour about 1/4 cup of batter into the pan and tip to spread the batter to the edges. When bubbles form on the top and the edges are dry, flip over and cook until lightly browned on the other side and edges are golden. Repeat with remaining batter.
Fill crepes with your favorite fruit, cream, caramel or even ice cream or cheese to serve.
This is the basic crepe, but if you want to have the veggie version  you can add some herbs and pepper to the mix and serve it with sauteed vegetables or whichever way you like your veggies.

Sunday, May 11, 2014

Crockpot Chocolate Lava Cake Recipe

Hope all you mom's out there had a fabulous Mother's day.I sure had one with loads of love, presents and yummy food. This delicious dessert was made by Aishwarya  and Jai as part of delicious spread of dishes they made for me. I think this recipe is a keeper as you can make silky smooth molten lavas without heating up your house.This delicacy is made in a crockpot and if you are looking for a molten lava recipe without eggs this is the one. Dedicating this post to all the awesome mothers in my life. Love you all. And a big thank you to my daughter and husband for treating me like a queen today and everyday; you both make  everyday a mother's day for me.
Recipe source: Thismamaloves.com
Ingredients
1 C. Sugar + ½ C. sugar (set aside)
1 C. flour
3 Tbs. unsweetened cocoa powder + 3 Tbs. cocoa powder (set aside)
2 tsp. Baking powder
1 tsp. Salt
3 tbs. butter or margarine, melted
1 tsp. Vanilla
12 oz. chocolate chips
2 C. hot water
Method:
Using a non-stick spray grease the inside of your crockpot.
In a medium size bowl combine flour, 3 tbs. of cocoa powder, baking powder and salt. Set aside
In another bowl, combine the sugar, vanilla and melted butter. Next, slowly fold the dry mixture in and mix well.Pour the batter into your greased crockpot. Pour the 12 oz. of chocolate chips on top of the batter.
Combine your 2 cups of hot water, 3 tbs. of cocoa powder and the ½ cup of sugar you set aside earlier. Stir until the sugar is melted. Slowly pour the mixture over the top of your batter and chocolate chips
Cook for 2 hours on high and then another 2 hours on low.
Cook time may depend on your crockpot so keep an eye on it. Makes approximately 8 servings.
Serve with whipped cream or vanilla ice cream on the side. 

Monday, May 5, 2014

Western / Denver Sandwich


Yesterday was a busy day; we  were all so engrossed with what we were doing that we didn't  realize we hadn't had our breakfast. At about 11 Aishwarya told us that she has made us a special brunch; an all American sandwich called a Western/Denver Sandwich. When we took a bite into the sandwich we realized that  it is none other than our own omelette sandwich from India. This led to a big argument about the origin of the sandwich and its name. So to put everything straight we googled Western/Denver sandwich and Aishwarya was indeed right there existed a sandwich by this name,we also learned that in some places its called a cow-boy sandwich. Whatever the name or wherever it originated I guarantee this is one yummy and filling sandwich and that  we were  so proud that our little girl was so thoughtful and could put together such a delicious brunch. I am now looking forward to more dishes to be made by Aishwarya.

Ingredients
1/4 cup chopped onion
 1/2 teaspoon diced green chilli
1/4 cup diced red/ green pepper
 1/4 cup diced cabbage(optional)
 1/4 cup diced cooked ham (optional  )
 2 tablespoons
 1 tablespoon  milk
 1 tablespoon minced fresh parsley(optional)
 4  Eggs
 1/4 teaspoon  freshly ground pepper
 1/4 teaspoon   Salt
 4 slices bread, toasted

Method:
In a large nonstick skillet, saute onion and green pepper in 1 tablespoon butter until tender. Stir in ham if using and parsley. Whisk the eggs, salt, pepper and milk. Add egg mixture to skillet (mixture should set immediately at edges).
As eggs set, push cooked edges toward the center, letting uncooked portion flow underneath. When the eggs are set; cut into wedges. Spread each slice of toast with  remaining butter. Serve omelet wedges on toast.

Tuesday, April 29, 2014

Avalose Podi

Avalose podi is a very common and popular snack from Kerala. As the name suggests, it is a snack in the powder form. Avalose podi has a long shelf life, hence it can be made in bulk and stored. This is usually eaten with sugar along with or without banana. I also know people who take this with their coffee or tea. Nowadays, it's readily available in shops, but trust me, you will surely love this homemade version more than the store-bought one.
Ingredients:
Raw rice- 1/2 kilogram
Coconut (scraped)- 1 full
Shallots-1-2 minced very fine
Salt a pinch
Cumin seed / Jeera- 1 teaspoon
Black sesame seeds- 1&1/2 teaspoon

Method
Soak rice in water for 4 hours, drain it, dry it and make it into coarse powder.I used my food processor and it was just perfect.  Scrape coconut and keep it aside.
 In a wide mouthed bowl, mix the rice flour, scraped coconut,shallots, 1/2 teaspoon cumin seeds, and salt.  Rub it nicely with your fingers and mix it nicely.  Keep it aside for 1 hour.  (Take care the rice flour should be dry)After one hour, heat a heavy bottomed pan or kadai.
 Add the rest of the cumin seeds and black sesame seeds and roast it.  Then add the mixture and roast it nicely till the color starts changing  to light brownish color at a low heat.
 As soon as it is done transfer the contents to another bowl.  Otherwise it will get over cooked by  the heat of the pan.
In case you have lumps sift the flour through a sieve (a bigger one) and then grind the bigger pieces that are left.  Fry that well and mix it with the fried avalose podi.
Allow it to cool and then store it in an airtight container.
 Serve it with sugar and bananas.

Sunday, April 20, 2014

Deconstructed Deviled Eggs

If you are looking for ways to use up eggs from your Easter egg hunt left-overs, here is a popular and easy dish which is even further simplified. Hope you would all enjoy this as much as we did.
Recipe source: Honestly yum
Ingredients:
12 eggs
1/3 cup of good mayonnaise
1 teaspoon of dijon mustard
1 teaspoon of white vinegar
1/2 shallot
Parsley
paprika
Celery salt and freshly ground black pepper to taste
Method:
Make medium-boiled eggs. Bring a small pot of water to a boil (make sure the pot is wide enough so all the eggs fit in one layer). Use just enough water so they barely cover the eggs. Lower the heat to a very gentle simmer. Place the room temperature eggs in the boiling water very carefully. I use a large spoon to slide them in. Cook for 6-7 minutes and immediately remove from heat and run under very cold water to stop the cooking.
Peel the eggs and slice the eggs in half. Sprinkle a little salt and pepper over them.
To make the dressing, combine mayonnaise, dijon mustard and roughly chopped 1/2 shallot in a food processor and blend. Add the vinegar and blend again until smooth. Place a dollop on each egg and add a pinch of paprika over the eggs.
Roughly chop the parsley and add a pinch on each egg.

Related Posts Plugin for WordPress, Blogger...